

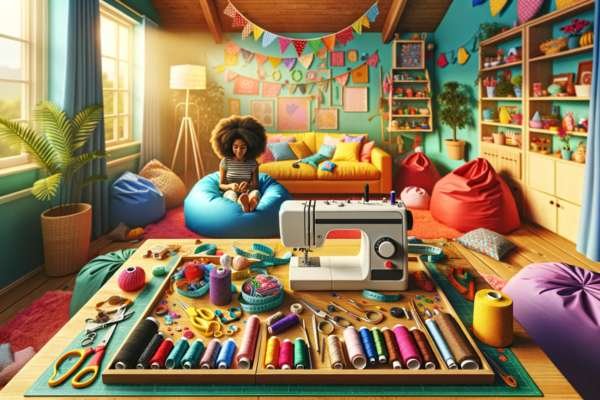
Creating a bean bag chair for a child’s room can be a delightful project that adds a touch of comfort and style to the space. These chairs are beloved by kids for their soft, enveloping feel, and by parents for their versatility and ease of maintenance. In this guide, we’ll walk you through the essentials of crafting a safe, durable, and cozy bean bag chair that’s perfect for reading, relaxing, or playing. We’ll focus on choosing the right materials that are child-friendly and durable, ensuring the bean bag chair becomes a favorite spot in any child’s room. Let’s get started on this fun and practical addition to your child’s furniture collection!
1.Choosing the Right Materials for Your Bean Bag Chair:
When crafting a bean bag chair for a child’s room, selecting the proper materials is essential for both comfort and durability. Choose a robust, child-friendly fabric like cotton or microfiber, which are soft to the touch yet tough enough to endure frequent use and easy cleaning. For the filling, consider using polystyrene beads or high-quality memory foam, which provide adaptable support and retain their shape over time.
Make sure all materials are non-toxic and hypoallergenic to ensure a safe environment for children. By carefully selecting these materials, you’ll create a bean bag chair that not only brightens up any child’s room but also offers a cozy spot for reading, relaxing, or playing.

2.Tools Needed to Make a Bean Bag Chair:
When setting out to make a bean bag chair, particularly for a child’s room, having the right tools on hand simplifies the process. Essential tools include a sewing machine for sturdy stitching, a fabric scissors for precise cuts, and a tape measure for accurate sizing. You’ll also need a funnel or a large spoon for filling the bean bag without mess. Optionally, a seam ripper might be handy for correcting any mistakes smoothly. With these basic tools, you can craft a custom bean bag chair that’s both safe and perfect for your child’s room, providing a comfortable and stylish seating option.
3.Designing Your Bean Bag Chair:
Shapes and Sizes:
Creating a bean bag chair for your child’s room offers both a fun project and a versatile piece of furniture. Here are some considerations for shapes and sizes:
- Classic Round: The traditional round bean bag is perfect for general seating, easy to make and great for all ages.
- High-Back Chair: Provides better support for reading or homework sessions. This shape is ideal for older children who need extra back support.
- Novelty Shapes: Think about fun shapes like stars, animals, or even cars that can spark your child’s imagination and decorate their room.
- Size Considerations: For younger children, a smaller, more manageable size ensures they can easily use it. Teens might appreciate a larger, more lounge-type bean bag for relaxation.
Choosing the right shape and size makes the bean bag chair not just a piece of furniture but a cherished part of your child’s room decor.
4.Fabric Options:
Durability and Comfort:
When crafting a bean bag chair for a child’s room, selecting the right fabric is essential for both durability and comfort. Consider materials like canvas or denim, which are robust enough to withstand rough play and frequent wash a bean bag chair. For a softer touch, plush fabrics like corduroy or velour offer cozy comfort, ideal for reading or lounging. Additionally, look for fabrics treated for stain resistance, making cleanup after spills a breeze.
Choose vibrant or patterned fabrics to add a playful element to the room decor, ensuring the bean bag is not only practical but also visually appealing. By prioritizing these fabric options, you can create a durable, comfortable, and delightful seating choice for any child’s space.
5.Cutting the Fabric:
Patterns and Measurements:
When crafting a bean bag chair for a child’s room, accurately cutting the fabric is a fundamental step. Begin by choosing a pattern that complements the room’s decor—playful prints or vibrant colors are perfect for sparking joy and creativity. For a standard bean bag chair, you’ll need about 6.5 yards of fabric. Use a pattern that consists of two circles for the top and bottom and a rectangular piece for the sides.
The diameter of the circles should be approximately 45 inches, while the rectangle’s dimensions should be about 140 inches by 45 inches, allowing for seams. Ensure your measurements are precise to prevent any misalignment during sewing. With the right pattern and careful measuring, your fabric pieces will come together seamlessly, forming the perfect comfy spot for any child’s room.
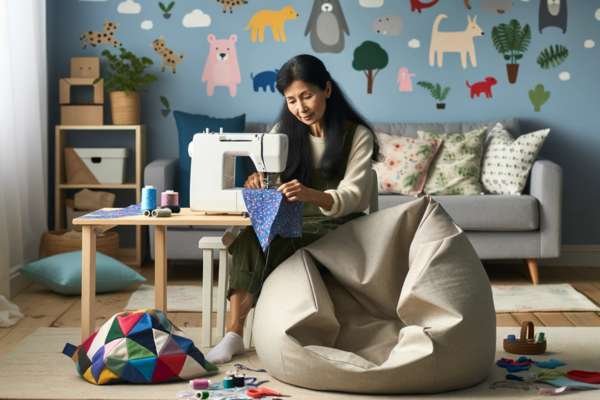
6.Sewing Techniques for a Bean Bag Chair:
Sewing a bean bag chair for a child’s room requires simple techniques that ensure durability and safety. Start by choosing a strong, child-safe fabric like cotton or canvas. Cut two pieces of fabric into large circles or rectangles, depending on the desired shape of your bean bag. Sew the pieces together with a heavy-duty thread, leaving a section open for filling. Reinforce the seams by sewing them twice, which prevents the filling from spilling out and increases the chair’s longevity.
Once filled with a child-safe material like polystyrene beads or foam pellets, sew the opening shut with a strong stitch. This method not only creates a sturdy bean bag chair but also allows for customization in design to match any child’s room decor.
7.Adding a Zipper:
Step-by-Step Guide:
Adding a zipper to your homemade bean bag chair enhances its functionality, allowing for easy removal and washing of the cover. Here’s a simple step-by-step guide:
- Measure and Cut: Determine the length of the zipper based on the size of your bean bag. Use this measurement to cut a slit in the fabric where the zipper will be installed.
- Pin the Zipper: Align the zipper teeth down the center of your slit and pin it in place, ensuring the fabric edges meet neatly over the zipper.
- Sew the Zipper: Using a sewing machine, stitch along the pinned area. Keep the stitches close to the zipper teeth for a secure fit.
- Test the Zipper: Once sewn, gently zip and unzip to ensure it moves smoothly without catching the fabric.
By following these steps, you’ll add a practical element to your bean bag chair, making maintenance a breeze.
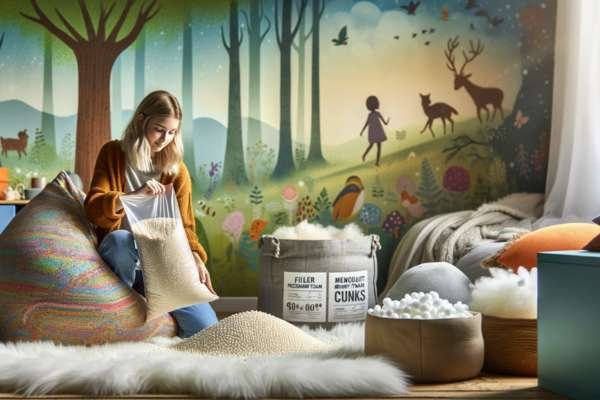
8.Selecting the Right Filler for Make a Bean Bag Chair:
Selecting the ideal filler is essential when crafting a bean bag chair, especially for a child’s room. Polystyrene beads are a popular choice due to their lightweight nature and ability to conform to body shapes, providing comfort and support. Alternatively, shredded memory foam is another excellent option, offering a softer feel and longer durability as it doesn’t compress as quickly over time. For eco-conscious families, consider using recycled polystyrene beads or natural fillers like buckwheat hulls. Each type of filler has unique benefits, so consider the desired comfort level and the chair’s intended use. By choosing the right filler, your homemade bean bag chair will be a cozy, inviting spot for relaxation and play in any child’s room.
9.Filling the Bean Bag Chair:
Tips and Techniques:
Making your own bean bag chair can be a fun and rewarding DIY project, especially when it comes to filling it to just the right comfort level. Here are some simple tips and techniques for filling your bean bag chair:
- Choose the Right Filler: Common fillers include polystyrene beads, memory foam, or organic materials like rice or beans for a more natural feel.
- Prepare Your Space: Lay out a tarp or sheet to catch any spills and make cleanup easier.
- Use a Funnel or Spout: This helps direct the filler into the chair without too much mess. A makeshift funnel can be made from a cut plastic bottle.
- Fill to Desired Firmness: Less filler will make the bean bag softer and more pliable, while more filler will provide more support.
- Check for Comfort: Periodically test the chair by sitting on it to adjust the amount of filler to your comfort level.
- Seal Securely: Once filled to satisfaction, ensure the closure is tight to prevent any leaks.
By following these tips, you can create a comfortable and durable bean bag chair that’s perfect for your child’s room.
10.Sealing the Bean Bag Chair:
Ensuring No Leaks:
Ensuring your homemade bean bag chair remains leak-free is essential, especially in a child’s room where durability is key. To achieve this, double-stitch the seams of your chosen fabric to add strength and prevent the filling from escaping. Use a high-quality thread and consider a lining inside the outer cover for extra security. Additionally, install a sturdy zipper and add a hook-and-loop fastener strip to conceal it.
This method not only enhances the seal but also allows for easy maintenance and refilling of the bean chair. By focusing on these details, you’ll create a reliable and child-safe piece of furniture that can withstand energetic play and frequent use.
11.Decorative Touches:
Customizing Your Bean Bag Chair:
Adding personal touches to a bean bag chair can make it a delightful highlight in any child’s room. Start by choosing a fabric that complements the room’s decor—vibrant prints or favorite cartoon characters are popular choices. For a unique twist, consider adding a patchwork of different fabrics or a personalized name embroidery.
Additionally, think about incorporating practical yet stylish elements like pockets for storing books or gadgets and a handle for easy movement. These custom details not only enhance the aesthetic appeal but also boost the functionality of the bean chair, making it a cherished part of your child’s daily routine and playtime.
12.Safety Tips:
Making a Child-Friendly Bean Bag Chair:
Creating a bean chair that’s safe and perfect for your child’s room can be a rewarding DIY project. Here’s how to ensure the bean bag is child-friendly:
- Choose the Right Fabric: Opt for durable, washable fabrics that are soft yet sturdy.
- Secure Seams: Double-stitch seams to prevent any filling from escaping.
- Non-Toxic Filler: Use a child-safe, hypoallergenic filler like polystyrene beads.
- Proper Closure: Install a child-resistant zipper to keep the filler compartment secure.
- Regular Checks: Periodically inspect the bean bag for wear and tear to ensure it remains safe.
By following these guidelines, you’ll make a bean bag chair that not only adds a fun touch to your child’s furniture but also ensures their safety and comfort.
13.Maintenance and Care of Bean Bag Chairs:
Maintaining a bean bag chair is essential, especially in a child’s room, to ensure it remains clean and comfortable. Opti for a chair with a removable cover, which can be machine washed for easy cleaning. Regularly check for and mend any tears or weak seams to keep the filling secure. Additionally, fluff the chair often to maintain its shape and comfort. If using polystyrene beads, consider refilling the chair occasionally, as the beads can compress over time. Following these simple care tips will help extend the life of your bean bag chair, making it a lasting addition to your child’s room furniture.
14.Common Mistakes to Avoid When Making a Bean Bag Chair:
When crafting a bean chair, especially for a child’s room, avoiding common pitfalls can ensure a durable and safe product. First, don’t skimp on fabric quality; choose robust materials like thick cotton or microfiber that can withstand frequent use and are easy to clean. Secondly, ensure the seams are double-stitched to prevent any filling from escaping, which can be a safety hazard for young children. Another frequent oversight is using the wrong type of filling; opt for virgin polystyrene beads or high-quality foam that retains shape and doesn’t flatten easily.
Lastly, always check that the materials used are non-toxic and safe for children’s environments. By steering clear of these mistakes, you’ll create a comfortable, lasting bean bag chair that’s perfect for any child’s room.

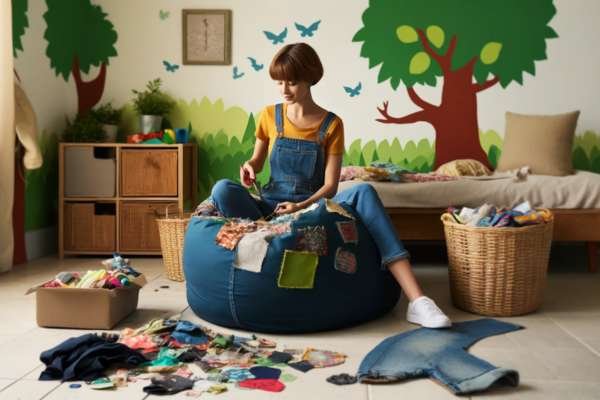
15.Recycling Old Materials into a New Bean Bag Chair:
Creating a bean chair for a child’s room can be both eco-friendly and fun by recycling old materials. Start by repurposing soft, durable fabrics such as old curtains or jeans for the outer cover, ensuring they’re clean and free from wear. For the filling, consider using old stuffed animals, excess pillow stuffing, or even recycled foam pieces. This approach not only gives a new life to unused items but also adds a personal touch to the room. Make sure all materials are safe and free from sharp objects before assembling your bean chair. This project not only reduces waste but also creates a cozy, unique seat that children will love.
16.Advanced Tips:
Adding Pockets and Features:
When making a bean bag chair for a child’s room, adding pockets and other features can enhance both its functionality and appeal. Here are some advanced tips to consider:
- Incorporate Pockets: Sew pockets on the sides or back of the bean chair to hold books, devices, or small toys. Use contrasting colors for a fun look.
- Add a Handle: Attach a sturdy handle on top for easy moving. This makes the bean bag more versatile and accessible for children.
- Zipper Covers: Use removable covers with zippers for easy cleaning. This is especially useful for managing spills and maintaining hygiene.
- Safety First: Ensure all additions, like zippers and pockets, are securely attached to avoid any safety hazards.
- Personalization: Consider adding a name tag or custom embroidery to make the bean chair extra special for your child.
These enhancements not only add functionality but also a personal touch to your child’s bean bag chair, making it a beloved part of their room furniture.
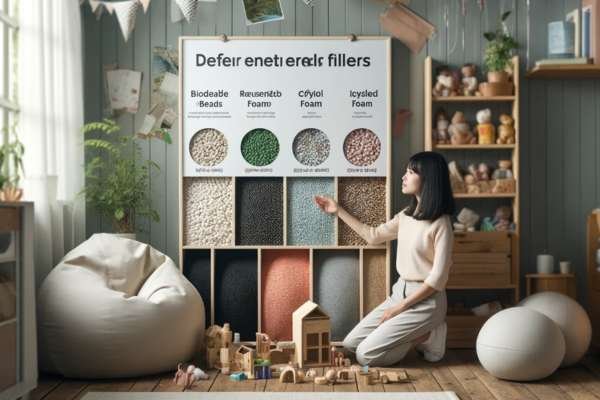
17.The Environmental Impact of Different Fillers:
When creating a bean bag chair, especially for a child’s room, it’s essential to consider the environmental impact of the fillers used. Traditional polystyrene beads, while lightweight and comfortable, are not biodegradable and can be harmful to the environment if not disposed of properly. An eco-friendlier option is to use recycled polystyrene beads or natural fillers like organic buckwheat hulls.
These materials not only minimize environmental harm but also maintain the adaptability and comfort bean bags are known for. By choosing sustainable fillers, you contribute to a healthier planet while providing safe and cozy furniture for children’s rooms.
18.DIY Project:
Making a Matching Footstool:
When making a bean bag chair for a child’s room, why not add a matching footstool? Here’s a simple DIY project to complete your cozy setup:
- Materials Needed: Gather soft, durable fabric like cotton or polyester, a reliable sewing kit, and filling such as foam beads or recycled polystyrene.
- Cutting Fabric: Measure and cut two circles for the top and bottom of the footstool, and a rectangular piece for the sides.
- Sewing: Stitch the side piece into a circular shape, then sew one circle to one end. Leave the other end open for filling.
- Filling: Fill the footstool with your chosen material until it’s firm yet comfortable.
- Closing Up: Sew the open end shut, ensuring it’s secure.
This DIY footstool not only complements the bean bag but also adds functional charm to any child’s room.
Conclusion:
Crafting a bean bag chair for a child’s room is a rewarding project that combines comfort with creativity. By selecting the right materials, such as washable fabrics and hypoallergenic fillers, you ensure the chair is both safe and durable. This cozy addition to your child’s furniture collection will provide a perfect spot for reading, relaxing, or playing, making it a cherished part of their personal space. With simple steps and the right materials, anyone can create a bean bag chair that is both functional and stylish.