

Hanging art on a brick wall can seem like a challenging task, but with the right tools and techniques, it’s a simple and rewarding project. Whether you’re looking to display a single piece or create a gallery wall, knowing how to hang art on a brick wall properly ensures your artwork is secure and visually appealing. In this guide, we’ll walk you through the steps, from choosing the right hardware to drilling into brick safely, so you can confidently showcase your art without causing damage to your wall. Let’s explore the best methods for hanging art on brick walls, creating a stunning space in your home.
Understanding Your Brick Wall
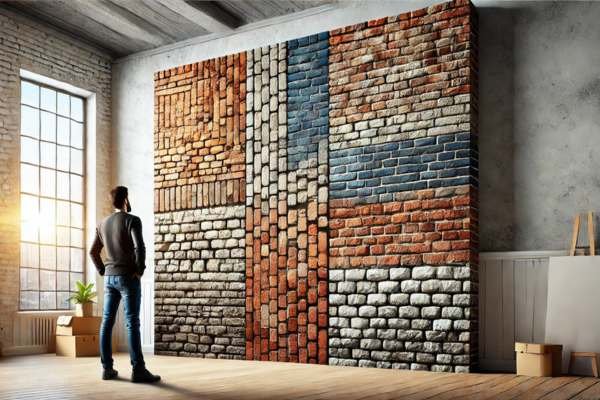
Before you even think about hammering a nail or hanging your masterpiece, you must get to know your brick wall. It’s not just about the visual appeal of the bricks, but the structure itself. Are you staring at the raw, traditional bricks, or a sleek, modern veneer? Is the surface smooth and even, or does it have that delightful, uneven texture that seems to speak of age and history? This matters. The surface’s condition and texture will dictate your approach. Walls with prominent mortar joints, cracks, or rough surfaces require more thoughtful preparation to avoid your art from leaning, shifting, or falling off over time. The more you know about the wall, the better your installation will be.
Essential Tools You’ll Need To Hang Art On A Brick Wall

Hanging art on a brick wall is no impromptu decision. It calls for the right tools and a bit of know-how. The essentials include:
- Measuring tape: For that crucial, perfectly placed position.
- Drill with masonry bits: To make precise holes without cracking the brick.
- Hammer: For those reliable nails or anchors that hold the art tight.
- Brick clips or wall hooks: The no-drill savior for the cautious or the renter.
- Level: To ensure your art isn’t just ‘there,’ but perfectly aligned.
- Pencil: To mark your spots with delicate precision, without leaving a trace.
If you’re not keen on drilling into your precious bricks, consider adhesive hooks or no-drill wall hangers. But note, these are better for smaller, lighter pieces—they’re not built to hold your oversized canvas.
Preparing The Brick Surface For Art Installation
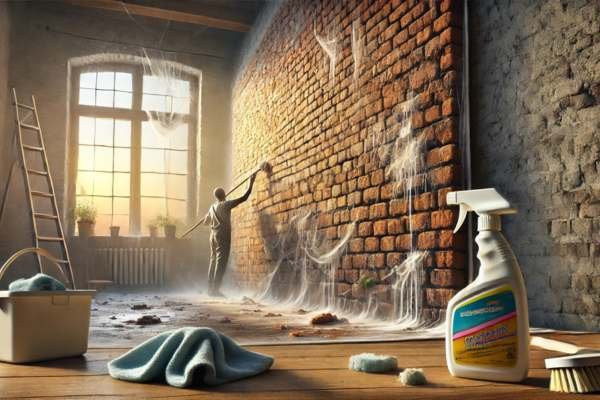
You wouldn’t hang art on a dusty, grimy wall, right? The same goes for brick. Over time, brick accumulates dirt, cobwebs, and grime. Before you start installing, grab a soft cloth or a scrub brush to wipe down the surface. Don’t use harsh chemicals that could discolor or damage the wall—keep it gentle. If your brick’s in rough shape, use a masonry cleaner to get into the tough spots. Once the surface is clean, let it dry thoroughly. After all, a clean, dry wall makes for a stronger grip on any hardware or adhesives you decide to use.
Choosing The Right Art For Your Brick Wall

The bold texture of a brick wall invites an equally bold choice of art. The contrast between the rough, earthy tones of brick and a well-chosen piece of artwork can be striking. If you’re into dramatic flair, large, vivid works will stand out against the starkness of the brick, adding depth and character. On the flip side, if you’re after subtlety, delicate or smaller pieces may blend in beautifully. Think about the overall vibe—brighter colors and bold prints pop against a dark bricks wall, while muted tones or monochrome art offer a more harmonious, understated feel. Consider not just the style, but also the function of the space: A cozy living room might beg for warm, inviting tones, while a sleek, industrial room could be perfect for minimalist, black-and-white photography.
Planning Your Layout How To Find The Perfect Spot
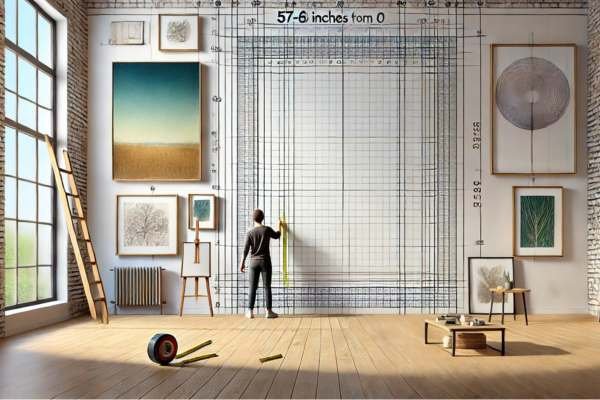
Location, location, location! This is the secret to turning any wall into a gallery. The trick lies in balance—measuring not only the artwork but the space itself. When positioning your piece, aim for eye level. Typically, the center of your art should fall between 57-60 inches from the ground. However, don’t stop there—consider how much breathing room your art needs. Too much empty space can make the piece feel isolated, while overcrowding may make the wall feel chaotic. If you’re grouping multiple works, spacing is key—ensure they align to create a cohesive, unified look.
Choosing The Right Hanging Method For Brick Walls

Now that you’ve found the perfect spot, it’s time to choose the right method to secure your artwork. There are numerous ways to method this, and your preference depends on the scale and weight of your piece, as well as your desire for permanence.
- Masonry nails: A great option for lightweight art, these nails can be driven into the mortar between bricks, offering a secure hold.
- Wall anchors: Ideal for medium-weight pieces, these anchors disperse the weight evenly and offer a more secure solution.
- Brick clips: A game-changer for those who want to avoid drilling. Bricks clips simply latch onto the edges of the bricks, making them an excellent choice for renters or those looking to preserve the wall’s integrity.
How To Hang Art Using Brick Clips

Brick clips are a handy, non-invasive solution. First, measure the height and width where you want your artwork to sit. Then, place the clips around the edges of the brick, ensuring they’re firmly latched. Next, hang your art using the clips as your support system. This method is quick, efficient, and perfect for lightweight artwork that doesn’t demand the weight of heavy-duty anchors or screws. It’s an ideal solution for those who want a hassle-free, damage-free installation.
Step-By-Step Guide On How To Hang Art On A Brick Wall
- Measure and mark where your artwork will go. Ensure you’ve calculated the perfect spot.
- Clean the wall to guarantee a secure grip for your hardware.
- Mark the holes where screws, nails, or clips will be installed.
- Drill holes into the mortar (never the brick!) using a masonry bit.
- Install your anchors if needed for heavier pieces.
- Hang your artwork and use a level to make sure it’s aligned.
- Adjust as needed for the perfect, balanced look.
Choosing The Best Placement For A Cohesive Look

A cohesive arrangement requires a sense of proportion and flow. Whether it’s a single large piece or a series of smaller works, consider how the artwork interacts with the wall and surrounding space. Large walls benefit from multiple pieces or oversized artwork, while smaller walls may look best with a single statement piece. Keep spacing consistent when arranging multiple artworks, and take into account the surrounding décor. The goal is to create a balanced visual composition that feels curated and intentional.
Creative Lighting Tips For Brick Wall Art
Lighting can take your artwork from great to mesmerizing. Use wall sconces or picture lights to direct focused beams onto your art, creating a dramatic highlight. Track lighting offers flexibility, allowing you to adjust angles and intensities. Be mindful of lighting placement—too much light can create glare, while shadows can obscure important details. The right lighting can truly elevate the visual experience, bringing the artsy and the bricks wall together in a symphony of texture and light.
Tips For Hanging Art Outdoors On Brick Walls
Outdoor art needs to withstand the elements. Exposure to sun, rain, and wind can damage both the artwork and the brick wall, so extra care is essential. Choose materials specifically designed for outdoor use—weatherproof frames, UV-resistant coatings, and durable art materials will help protect your work. Ensure the hardware is secure enough to handle the outdoor conditions. Wind can be particularly tricky, so opt for fixtures that can keep your artsy in place, regardless of the weather.
Common Mistakes To Avoid When Hanging Art On Brick Walls
- Misjudging measurements: An off-center or misplaced artwork can throw off the entire balance of the room.
- Using unsuitable hardware: Using nails or anchors that can’t bear the weight of your artwork can lead to disaster.
- Overcrowding: Too many pieces in a confined space will make the wall feel cluttered and unappealing.
- Ignoring wall condition: Always check the integrity of the wall before starting—mortar, in particular, can wear out over time.
Maintaining And Adjusting Your Wall Art Over Time
Your artwork will inevitably shift over time, whether from weight distribution or natural settling. Regularly check the stability of the hardware, and adjust as needed. For outdoor art, clean the frames and surfaces to avoid dirt buildup or fading. The key is to remain vigilant—your art deserves to stay in top condition, no matter the passage of time.
Frequently Asked Questions
1. Can I hang art on a brick wall without drilling?
Yes, brick clips, adhesive hooks, or no-drill hangers offer a safe, no-damage alternative for hanging artsy.
2. What’s the safest way to hang large art on brick?
For large pieces, wall anchors or heavy-duty masonry screws provide the stability necessary to keep your artsy secure.
3. How do I prevent damage to the brick when hanging art?
Avoid drilling directly into the brick. Instead, opt for drilling into the mortar or use adhesive methods. Always ensure your hardware can bear the weight of your art.
Final Thoughts
Knowing how to hang art on a brick wall can transform your space while maintaining its unique texture and charm. By using the right equipment, along with masonry anchors or photo-placing hardware, you ensure your paintings is securely hooked up. Always degree cautiously and don’t forget the weight of the artsy to avoid damage. With these pointers, you may with a bit of luck grasp art on bricks partitions, improving the aesthetic of your property or workplace.