
Hanging art on a wall can instantly elevate the style and ambiance of any space. Whether you’re decorating a living room, bedroom, or office, knowing how to hang art on a wall properly is essential for creating a balanced and appealing look. From choosing the right wall placement to using the correct tools, this guide will walk you through each step. Learn how to measure, align, and securely hang your artwork to enhance the aesthetic of your home or workspace. With these simple tips, you’ll confidently display your favorite pieces and transform any room into a gallery of personal expression.
Choosing The Right Art For Your Wall
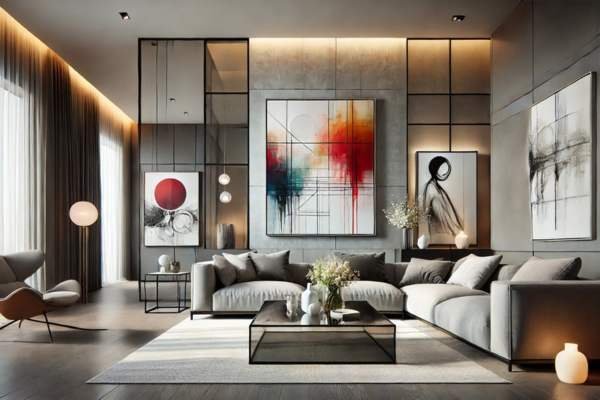
Choosing the right artwork for your space is a crucial first step, yet it’s often the most subjective. Art should be more than just an accessory; it should breathe life into a room. Start by considering the mood you want to evoke. Think about the size of the room: a vast living room can accommodate large, bold statements, while a cozy nook might benefit from something more intimate. Size and scale matter opt for larger pieces in expansive rooms to maintain balance and avoid underwhelming the space. Also, consider the color scheme. Your art should complement, not compete with, the room’s palette. If your room is minimalist, a piece with bold colors can create a striking focal point. If the decor is already rich with texture, maybe opt for something softer to avoid overwhelming the eye. Ultimately, art should elevate the room’s atmosphere and resonate with your personal taste, whether it’s modern, vintage, or eclectic.
Preparing To Hang Art On Your Wall
Preparation is paramount. The wall, after all, is a canvas in its own right, ready to showcase your vision. Start by choosing the ideal location for your art. Look for a wall that provides adequate space and doesn’t have furniture or other décor competing for attention. Measure the space carefully eye-level placement is often recommended, but the specific height will depend on the room’s layout. If you’re dealing with multiple pieces, take the time to plan the arrangement before making any holes. Use painter’s tape to visualize where each piece will go. This allows you to make adjustments and ensure the overall layout feels balanced before you commit to the final placement. Proper planning not only saves time but ensures that the artwork will shine in its intended setting.
Understanding Wall Types: Drywall, Brick, And Plaster
Your walls dictate how you’ll hang your art—different wall materials require different approaches. It’s crucial to understand what you’re working with before you start.
- Drywall: The most common material in modern homes, drywall is relatively simple to work with, but it demands the right tools. Standard nails or picture hooks often suffice, but for heavier pieces, make sure to use wall anchors to distribute the weight and prevent sagging.
- Brick: Brick walls require a more methodical approach. Traditional nails and screws won’t cut it here. Instead, you’ll need a masonry drill bit and wall anchors designed for brick. Focus on drilling into the mortar (not the brick itself) to ensure a secure mount.
- Plaster: Plaster, while sturdy, can be fragile and prone to cracking. For this material, use plaster anchors or screws designed for the task. Always drill carefully to avoid splitting the plaster, and if the piece is particularly heavy, consult a professional to avoid costly damage.
Essential Tools For Hanging Art
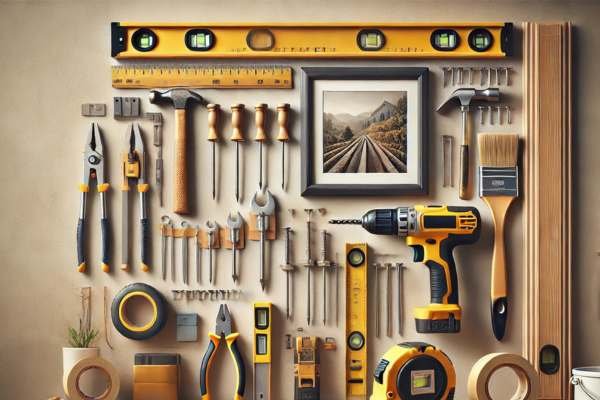
The right tools make the difference between a successful art installation and a frustrating disaster. The basic toolkit for hanging art includes:
- Measuring Tape: Precision is key when placing your art at the correct height and alignment.
- Level: A level ensures your artwork hangs straight, preventing the dreaded tilted frame.
- Hammer and Nails/Screws: Depending on your wall type, these will be your primary hanging tools. Nails work well for lighter pieces, while screws provide extra support for heavier items.
- Wall Anchors: Necessary for securing heavier pieces to walls that can’t support a simple nail.
- Pencil: Use this to mark your measurement points lightly, making adjustments easy.
- Stud Finder: This tool will help locate the studs in your drywall, ensuring that your screws go into a solid foundation.
Ensuring Proper Lighting To Highlight Your Artwork

Even the most stunning piece of art can be overlooked if it isn’t properly lit. The right lighting can make your artwork pop, highlighting its textures, colors, and intricate details. Invest in picture lights or track lighting to illuminate the piece effectively. Avoid placing art in direct sunlight as the harsh rays can cause colors to fade over time. LED lights are a fantastic choice for highlighting art—they emit minimal heat, are energy-efficient, and come in a variety of adjustable formats. Position the lighting in such a way that it enhances the piece, casting gentle illumination without creating harsh shadows.
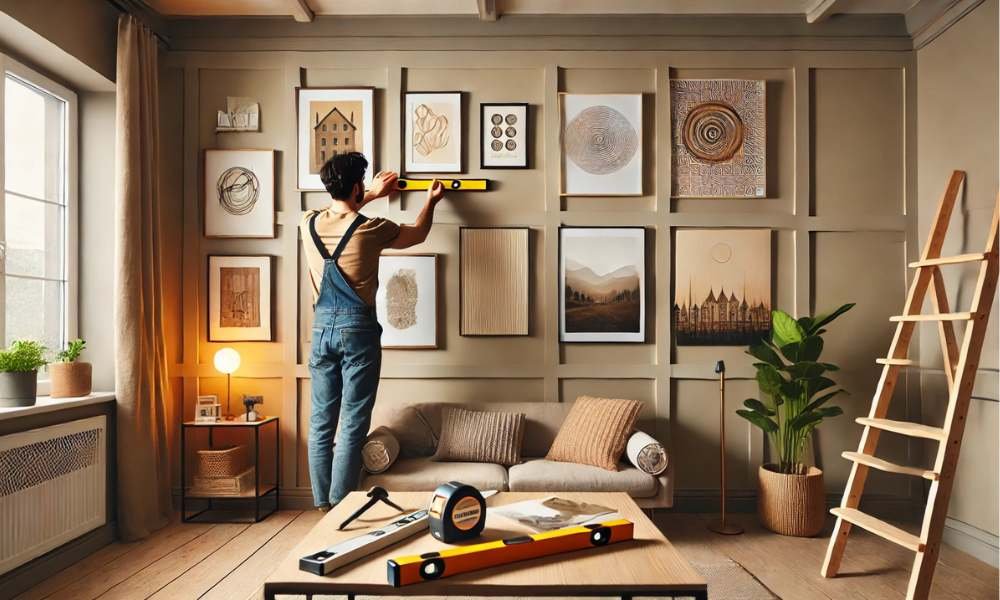
Deciding On The Perfect Placement
Placement isn’t just about physical positioning, it’s about creating harmony. The ideal height for hanging art is generally 57 to 60 inches from the floor, aligning with the average human eye level. However, placement also depends on surrounding furniture. When hanging art above a sofa or console table, leave about 6 to 12 inches between the top of the furniture and the bottom of the frame to establish a cohesive visual flow. Think of the art as part of a greater composition, complementing the room’s overall layout and furniture arrangement.
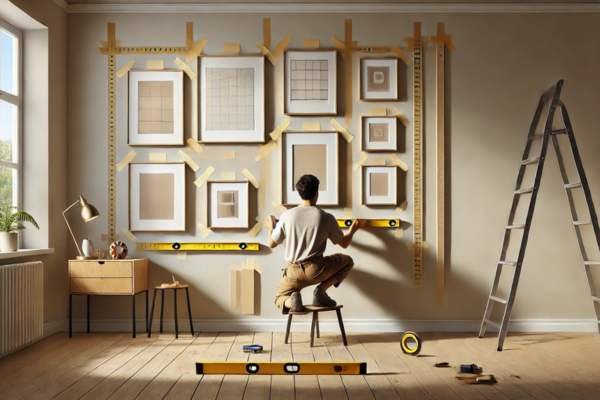
Arranging Multiple Art Pieces On A Wall
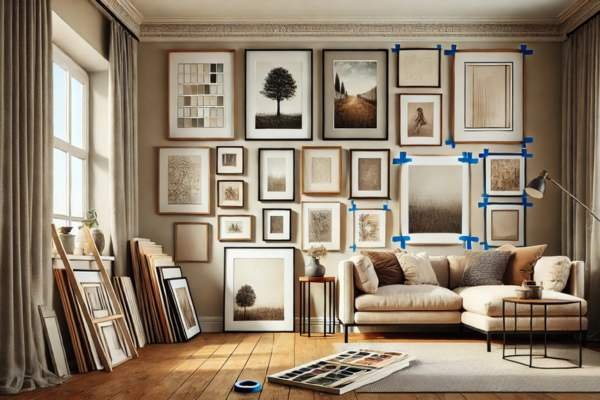
If you’re displaying multiple pieces, the layout is key. Whether you opt for a grid pattern, an eclectic mix, or a carefully curated gallery arrange art on a wall, consistency and balance are vital. Start by laying the pieces on the floor to experiment with different arrangements. Space them consistently or allow for organic variation depending on your aesthetic preference. Before making holes in the hang art on a wall, use painter’s tape to simulate the arrangement, adjusting the spacing until it feels right. This visual test ensures that you can tweak the layout before committing to permanent placement.
Step-By-Step Guide To Hanging Art On The Wall
Now that you’re ready, follow these steps for flawless execution:
- Measure and Mark: Begin by finding the center of your wall, then lightly mark it with a pencil. This will be your starting point for alignment.
- Level the Artwork: Use the level to mark the top edge of the frame on the wall, ensuring that it will hang straight.
- Install Anchors: Depending on the weight of your art and wall type, install the appropriate anchors or screws.
- Hang the Art: Place the artwork onto the hooks or screws, ensuring it’s secure and centered.
- Final Adjustments: Step back, assess from different angles, and make any necessary tweaks to ensure everything is aligned perfectly.
Creating A Gallery Wall: Tips For Layouts And Arrangements
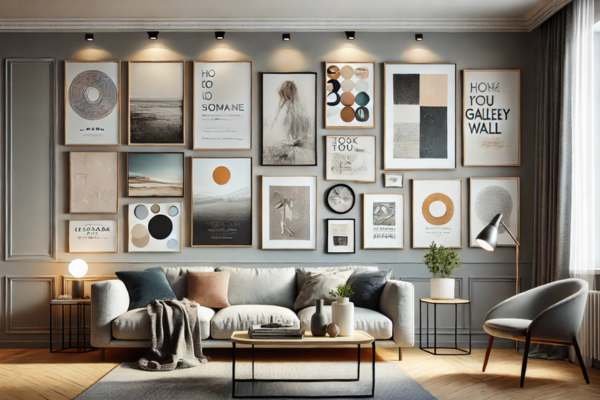
A gallery wall is a powerful way to display multiple artworks, but it requires thoughtful arrangement. Consider a uniform or eclectic layout depending on the overall vibe you want to create. Keep the spacing consistent to avoid visual clutter, and remember to keep the central focus at eye level. For a dynamic touch, mix various frame sizes and incorporate different art styles abstract, photography, typography to create a narrative that speaks to you.
Hanging Art On Different Wall Types
Each wall type presents unique challenges when hanging art:
- Drywall: Picture hooks or screws into studs will suffice, but for larger pieces, consider heavy-duty anchors.
- Brick: Use masonry drill bits to create the necessary holes and secure the art with masonry anchors.
- Plaster: Special anchors prevent cracking, and it’s best to use screws designed for plaster to maintain the integrity of the wall.
Choosing The Right Hanging Method
The method you choose for hanging art should be determined by its size and weight. For lightweight pieces, picture hooks or nails can do the trick. Heavier pieces require more substantial support—use a hanging system with multiple hooks or picture wire to distribute the weight evenly. For larger frames, D-rings provide additional security, allowing the artwork to hang securely without damaging the hang art on a wall.
Choosing Proper Wall Anchors For Heavy Art

When it comes to heavy art, the right anchors are essential. Drywall anchors, toggle bolts, and molly bolts are excellent choices for securing hefty pieces. Always ensure the anchors are rated for the weight of the art to avoid mishaps. It’s better to overestimate the weight and opt for stronger anchors than risk an underwhelming hold.
Tips For Hanging Large Or Heavy Art Pieces
For large or heavy pieces, the weight needs to be distributed evenly. Use multiple hooks or picture hanging wire to ensure the load is well-balanced. Always anchor into studs for additional security, and for especially valuable pieces, it may be worth hiring a professional to ensure a flawless installation.
Adding Personal Touches To Your Art Display
Your artwork display should be an extension of your persona. Mix frames, include unique portions, and even upload personal objects like tour souvenirs or custom artwork. This provides intensity and intrigue to your show, making it a communique starter and imbuing the room with an experience of heat and individuality.
Maintaining And Updating Your Art Display
Over time, your art collection may evolve. Rotate pieces to keep the space fresh and dynamic, and regularly inspect your frames to ensure they’re in good condition. Dust the frames with a microfiber cloth to maintain their shine, and update your artwork as your tastes change. A well-maintained art display is a living, breathing part of your home’s aesthetic evolution.
Frequently Asked Questions
1. How High Should Art Be Hung Above Furniture?
Generally, art should be hung 6 to 12 inches above furniture, ensuring a cohesive visual flow and preventing the art from feeling disconnected.
2. How Do I Choose the Right Wall Hooks?
The choice of hook depends on the weight of the art and the type of wall. For lightweight pieces, picture hooks or nails work well. For heavier works, use wall anchors or screws to provide a secure hold, especially when drilling into studs.
Conclusion
Hanging art on a wall can instantly elevate the style and ambiance of any space. Whether you’re decorating a living room, bedroom, or office, knowing how to hang art on a wall properly is essential for creating a balanced and appealing look. From choosing the right wall placement to using the correct tools, this guide will walk you through each step. Learn how to measure, align, and securely hang your artwork to enhance the aesthetic of your home or workspace. With these simple tips, you’ll confidently display your favorite pieces and transform any room into a gallery of personal expression.